
When you take a gander at a scene photograph, you likely know inside only a brief instant if it’s a decent photograph or not.
You probably won’t have the capacity to completely explain why it looks great.
By and large, lighting, sharpness and topic help make a decent photograph.
Be that as it may, the way in which the photograph is formed is likewise a critical component of its prosperity.
There are a lot of compositional principles of photography, as well. That implies that there are a wide range of ways that you can upgrade the look of your scenes, and take them from being simply so-so to being genuinely attractive masterpieces.
We should investigate a couple of principal scene photography piece decides that you have to begin utilizing today.
Fill the Frame With the Subject
Filling the casing is simple when taking a representation. You should simply outline a nearby, and you’re ready.
Filling the casing while capturing scenes is more troublesome.
All things considered, when you remain before a delightful, clearing vista, you need to reproduce that for the watchers of your photographs.
Lamentably, when shooting a substantial scene, having excessively void land in the casing can make your subject look and feel little. Also, the littler your subject, the less impactful it will be, also the less it will feel like it does, in actuality.
The arrangement is to fill the edge.
How to fill the frame
Search for vignettes in the bigger scene that may function admirably as the essential subject of your shot. Components with fascinating shapes, surfaces, or hues are ideal objectives.
On the off chance that you have a zoom focal point, utilize it. Zooming in encourages you trim out unneeded points of interest to concentrate more regarding the matter. In the event that you don’t have a zoom focal point, you’ll have to get physically nearer to the subject.
Stick to the Rule of Thirds. By putting the most intriguing components of the shot to one side or right of focus or above or beneath the level midline, you’ll have a more adjusted shot. In the picture above, take note of how the vertical line of trees is to one side of the edge, while the level line of trees is simply underneath the midline. In addition, the peak of the most noticeable slope is moved to one side for an additionally fascinating piece.
Keep It Simple, Stupid
When I was growing up, my grandpa’s most loved expression was “Keep it straightforward, inept.”
Regardless of what we were doing, if things began to go sideways, he’d counsel me to keep it straightforward.
It’s wise guidance for a great deal of things throughout everyday life, except it likewise functions admirably in photography.
Keeping it straightforward is difficult to do, particularly in the domain of scene photography.
When we see a perfect scene, it’s enticing to fuse each and every detail into the shot.
The issue is that our eyes can be promptly attracted to a solid subject, even in a jumbled domain.
Our cameras, in any case, can’t do that. Rather, we need to enable them to out by streamlining what their sensors record.
The most effective method to Keep It Simple
Search for shapes, lines, or hues to add enthusiasm to the shot without overpowering the scene. In the picture above, take note of how the state of the sand rises includes visual intrigue, however without diverting the eye from the palm tree.
Regions of light and shadow are superb apparatuses for keeping a scene intriguing, yet basic. The photograph above features this idea well: the daylight territories on the highest point of the hills includes brilliance that stands out well from the dim type of the palm tree and the murkiness out of sight.
Rearrange things advance by changing over your picture to high Photography composition. By expelling shading from the situation, you’ll instantly have a more shortsighted piece.
Utilize Leading Lines
Driving lines are one of the least demanding scene arrangement principles to execute, and a standout amongst the best too.
Practically anything can go about as a main line?—?a fence or a street, impressions in the sand or snow, a line of trees, or a pathway through a backwoods.
Distinctive kinds of lines can be utilized as well?—?converging lines like railroad tracks that appear to meet up out there, straight lines that cut over the scene, or even bended lines can be utilized successfully.
What’s more, what each one of those lines do is help tell the watcher’s eye where they should look straightaway.
In some photographs, driving lines interface the frontal area to the foundation, giving the photograph a superior feeling of profundity.
In different cases, driving lines interface the left and right sides of the shot, giving the picture a more prominent feeling of equalization.
In any case, lines are a critical instrument for giving watchers a “guided visit” of your picture. Perceive how to utilize driving lines with awesome outcomes in the video underneath by Joshua Cripps:
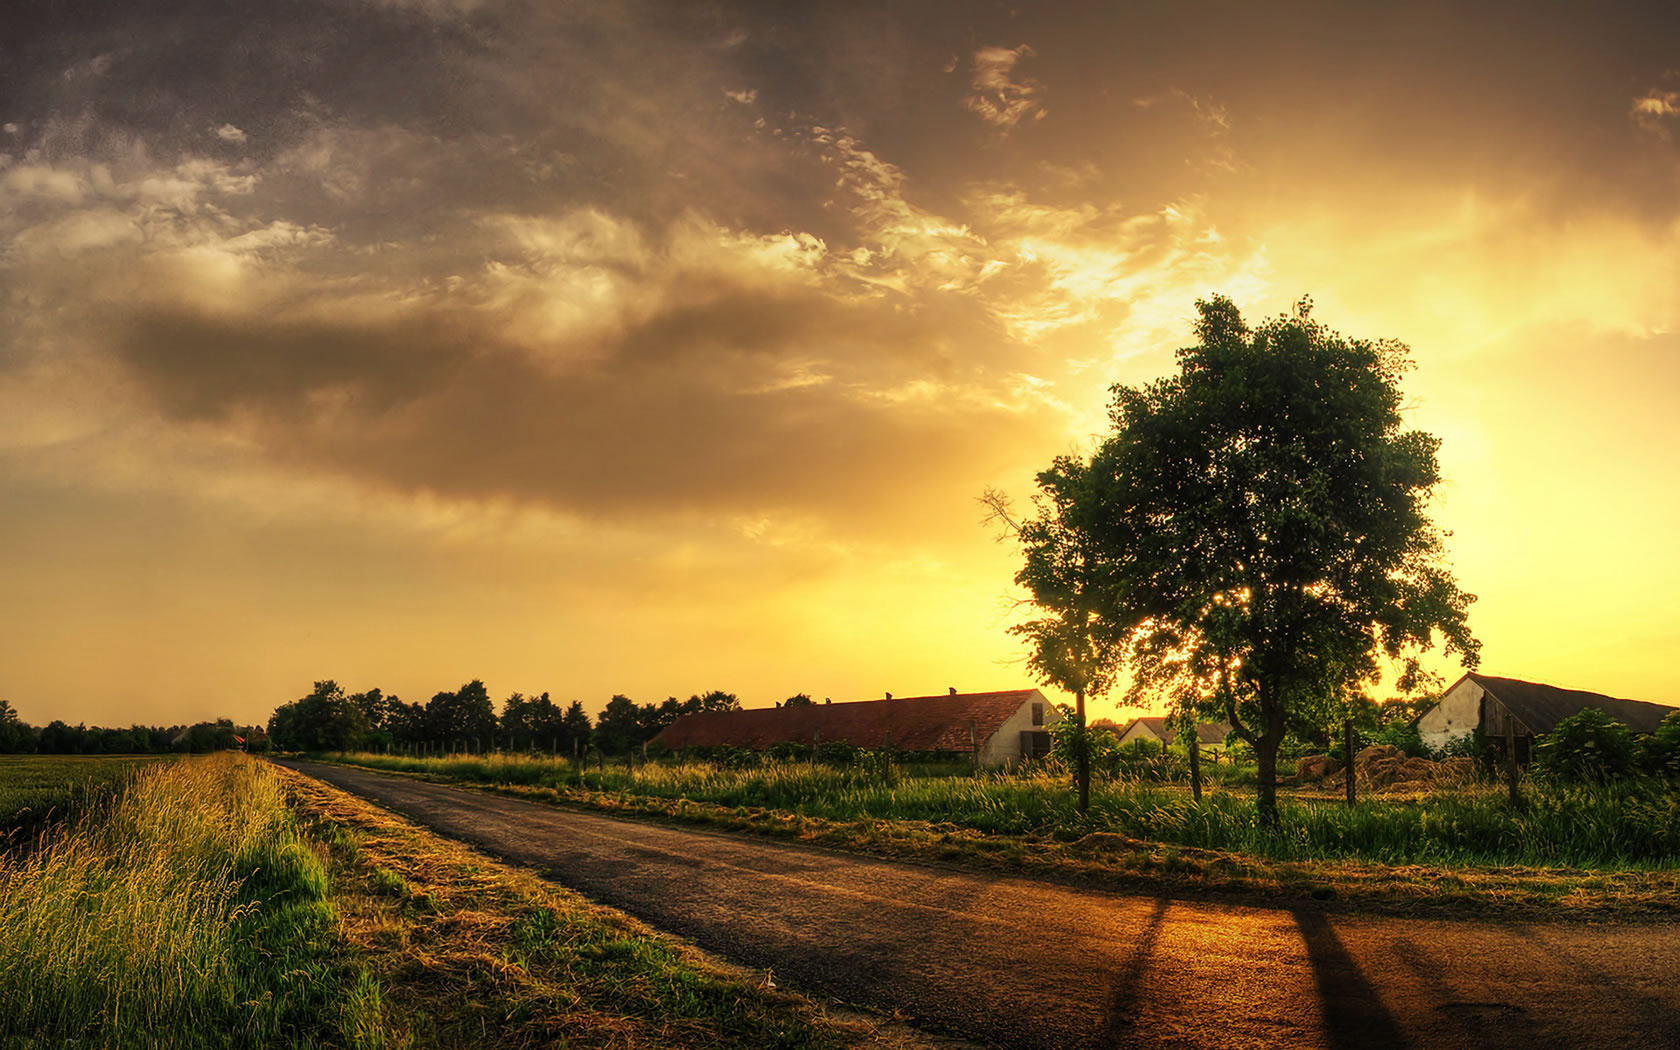
Step by step instructions to Use Leading Lines
Edge the shot with the end goal that the main line helps move the watcher’s eye towards something. In the picture above, take note of how the way drives specifically to the setting sun.
When utilizing a straight line or a uniting line, attempt to position yourself with a low point of view, that way the lines are more unmistakable in the forefront, as was done in the picture above.
When utilizing a bended line, look for a shooting position from above, with the end goal that the line has a chance to weave through the aggregate of the shot.
Shoot in Horizontal and Vertical Formats
On the off chance that I needed to figure, I’d state that somewhere around 75% of scene photographs taken by starting picture takers are in level arrangement.
However, categorizing oneself into just shooting wide is an error.
Of course, numerous scenes are best seen with a level shot, however frequently there are novel and intriguing perspectives to be had by pivoting the camera and shooting vertically.
This is particularly the situation when the topic is tall?—?a mountain pinnacle, trees, or a cascade.
Vertical organization scene shots are additionally perfect for circumstances in which there are intriguing components in the frontal area or you have a sky that is deserving of flaunting in the casing. Once in a while, you may even find that there are closer view components and a dazzling sky that need to involve some land in your shots, as found in the picture above.
Step by step instructions to Shoot in Horizontal and Vertical Format
Test yourself to shoot a vertical shot for each even shot you take.
Truly assess the scene to discover subjects that advantage from a vertical introduction. In the picture above, take note of how the vertical arrangement enables us to see the stones in the frontal area, which include profundity and measurement, and in addition the exquisite shades of the sky, which give the photograph included visual punch.
With the present cameras having such great goals, don’t be hesitant to edit your photographs in present preparing on change the picture to an alternate arrangement. For instance, you may edit a flat shot to be vertical or the other way around.
With that, you have a couple can’t-miss scene photography principles to take after for enhanced pieces.
Try not to stress over remembering each manage or utilizing every one on each photograph you make.
Rather, invest some energy getting acquainted with each lead so you can all the more serenely actualize them as required in your scene shots.
I’m certain you’ll see that with a little practice, you’ll begin seeing a discernible, positive change in the look and feel of the photographs you take.
Do you do not have the profundity of learning or the ability level expected to repeat the mind boggling scene shots you see the masters posting on the web each and every day?
Take our Landscape Photography Course and join the picture takers who have optimized their learning by acing the specialty of taking wonderment commendable scene shots in simply a question of days.