

Chatbots are artificially intelligent programs by which we can make our websites more interactive for the internet user, get better information from them, and serve them better with the least human interaction. For example, you have an e-commerce site that has many products, and here, the chatbot will help the user to find what they are really looking for by simulating human behavior. Chatbots can be used for hotel booking, flight bookings, selling/buying stocks, etc.
First, get dialogflow access at "https://dialogflow.com/" as shown below and click on "GO TO CONSOLE."

Now let's have a look at the basic building blocks of a Dialogflow architecture together with how to build the chatbot.
1) Agent is the Natural Language Understanding (NLU) component that captures user input and helps to convert that data into an appropriate response. This will be the bot the internet user will interact with.
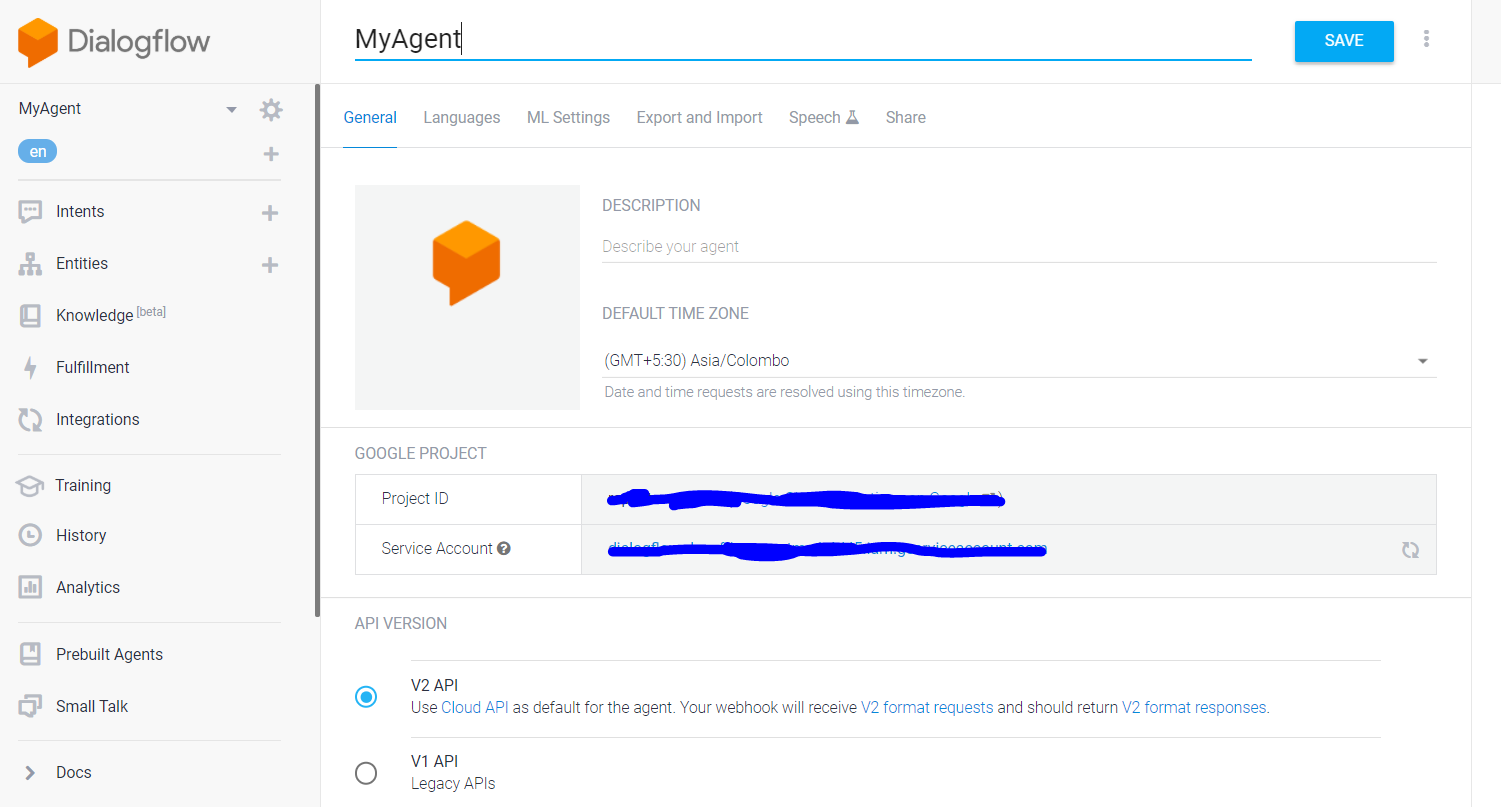
Above is an example of a simple Agent named MyAgent. We can provide a description for it, set time zones, and add other attributes as needed.
2) Intent is the component that maps user input to responses. For example, Welcome-intent will be used for greeting the user with an appropriate response like "Hi," "Hello," "Good morning, how may I help you.".etc.
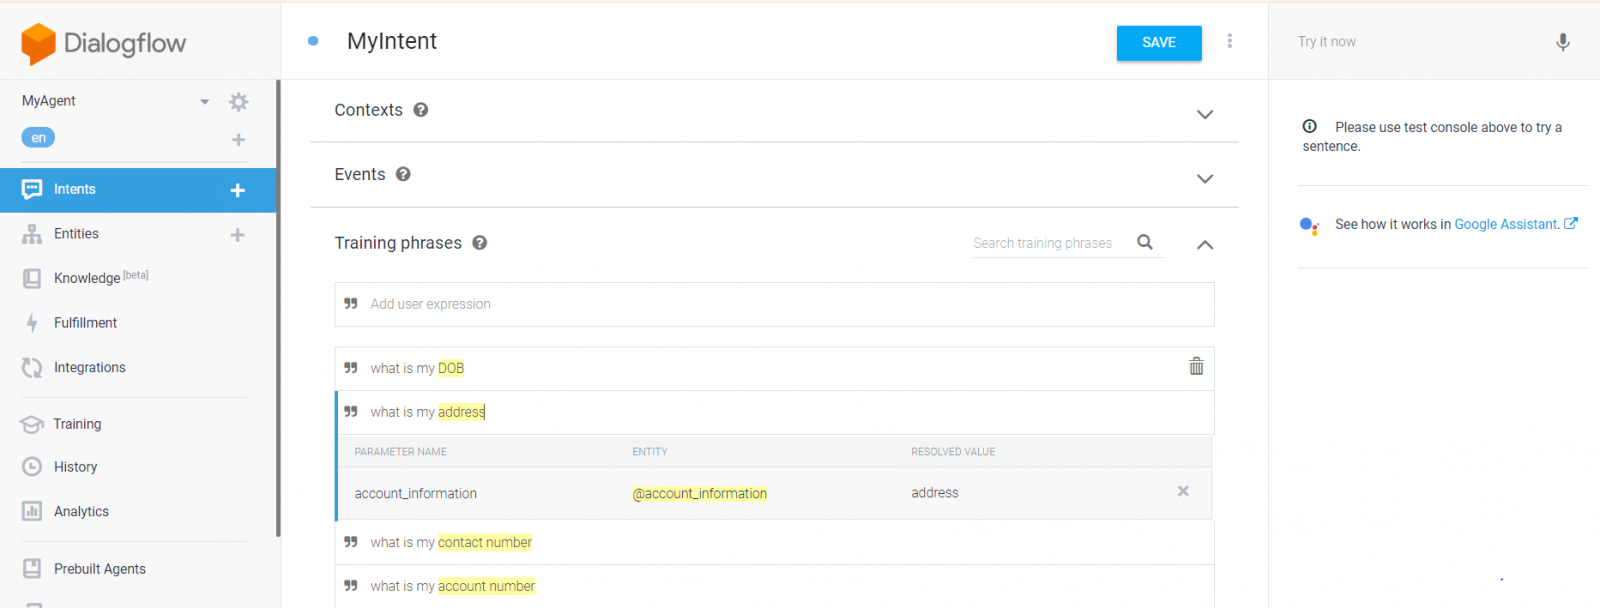
There can be many intents as per requirement. In this intent, we have defined the various questions like "what is my address," "what is my contact number," etc.
3) Entities are the components specific to one particular functionality like a product name, address, etc.

This entity contains balance, contact number, etc. These are the "Resolved values" against the "Parameter name" in intents.
Now let's write the code in node.js:
4) Code
"use strict";
const express = require("express");
const bodyParser = require("body-parser");
const restService = express();
restService.use(bodyParser.urlencoded({extended: true}));
restService.use(bodyParser.json());
restService.post("/chatbot", function (req, res) {
   if (req.body.queryResult.parameters.account_information == "contact number"
    && req.body.queryResult.parameters.account_information) {
    var speech = "999999999";
  }
  else if (req.body.queryResult.parameters.account_information == "account number"
    && req.body.queryResult.parameters.account_information) {
    var speech = "9999999999999";
  }
  else if (req.body.queryResult.parameters.account_information == "DOB"
    && req.body.queryResult.parameters.account_information) {
    var speech = "1 Jan 2019";
  }
  else if (req.body.queryResult.parameters.account_information == "address"
    && req.body.queryResult.parameters.account_information) {
    var speech = " floor no 1 , Building no 1 , address";
  }
  return res.json({
    fulfillmentText: "fulfillmentText",
    fulfillmentMessages: [{
      simpleResponses: {
        simpleResponses: [{
          "textToSpeech": "textToSpeech",
          "displayText": speech
        }]
      }
    }],
    source: "webhook-sample"
  });
});
I have used the hardcoded values for demonstration, and these values may be obtained from some business logic.
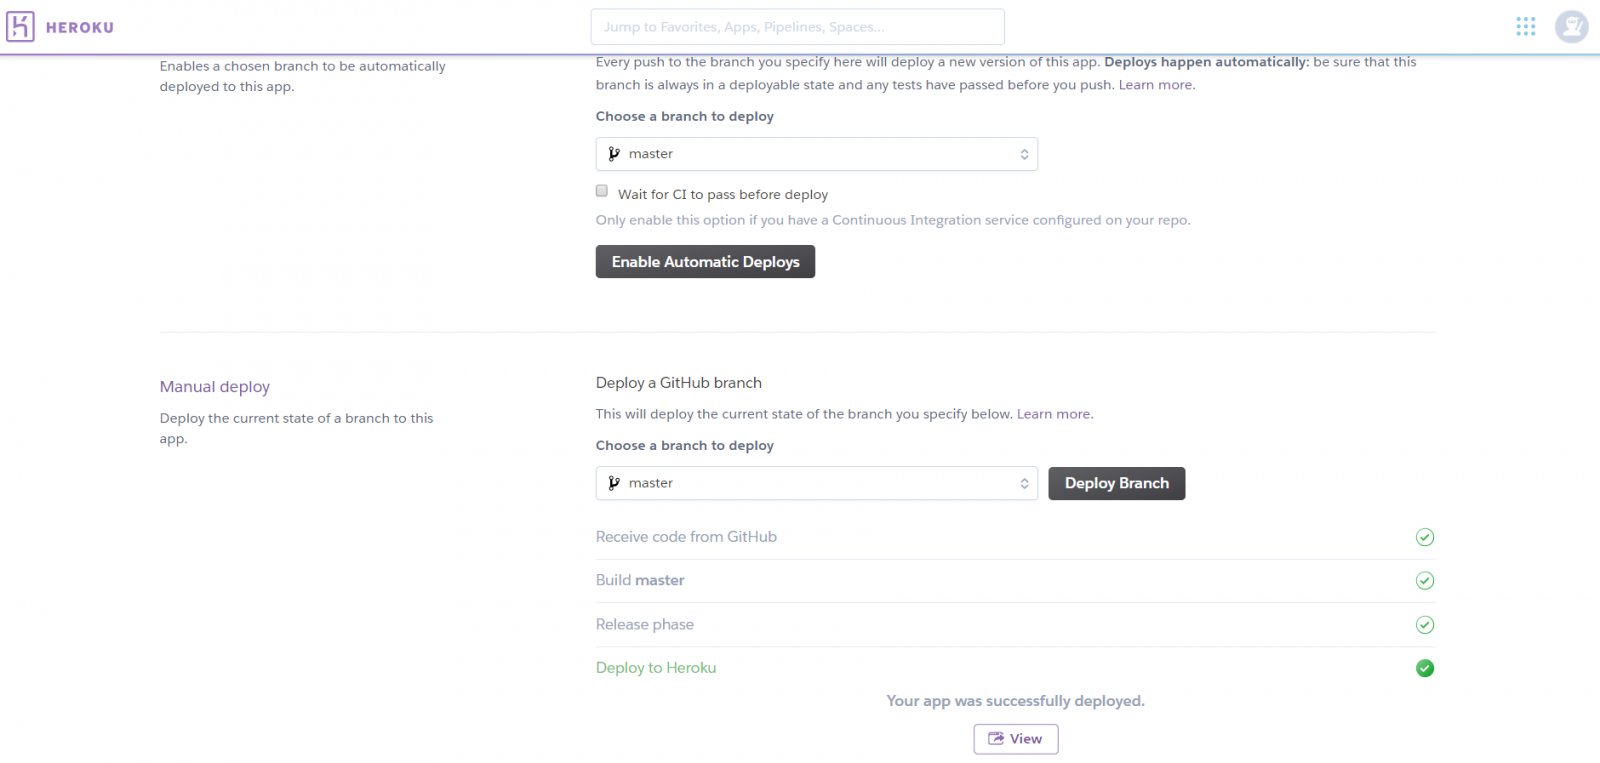
You can push the above code on GitHub and deploy your app on Heroku:
Also Read:- How to Build a Real-time Chat App With NodeJS, Socket.IO, and MongoDB
5) Heroku deployment:
Once the deployment is successful as shown on the screen, configure the fulfillment as below.
6) Fulfillment is the code that gets executed when the dialogflow agent calls business logic:
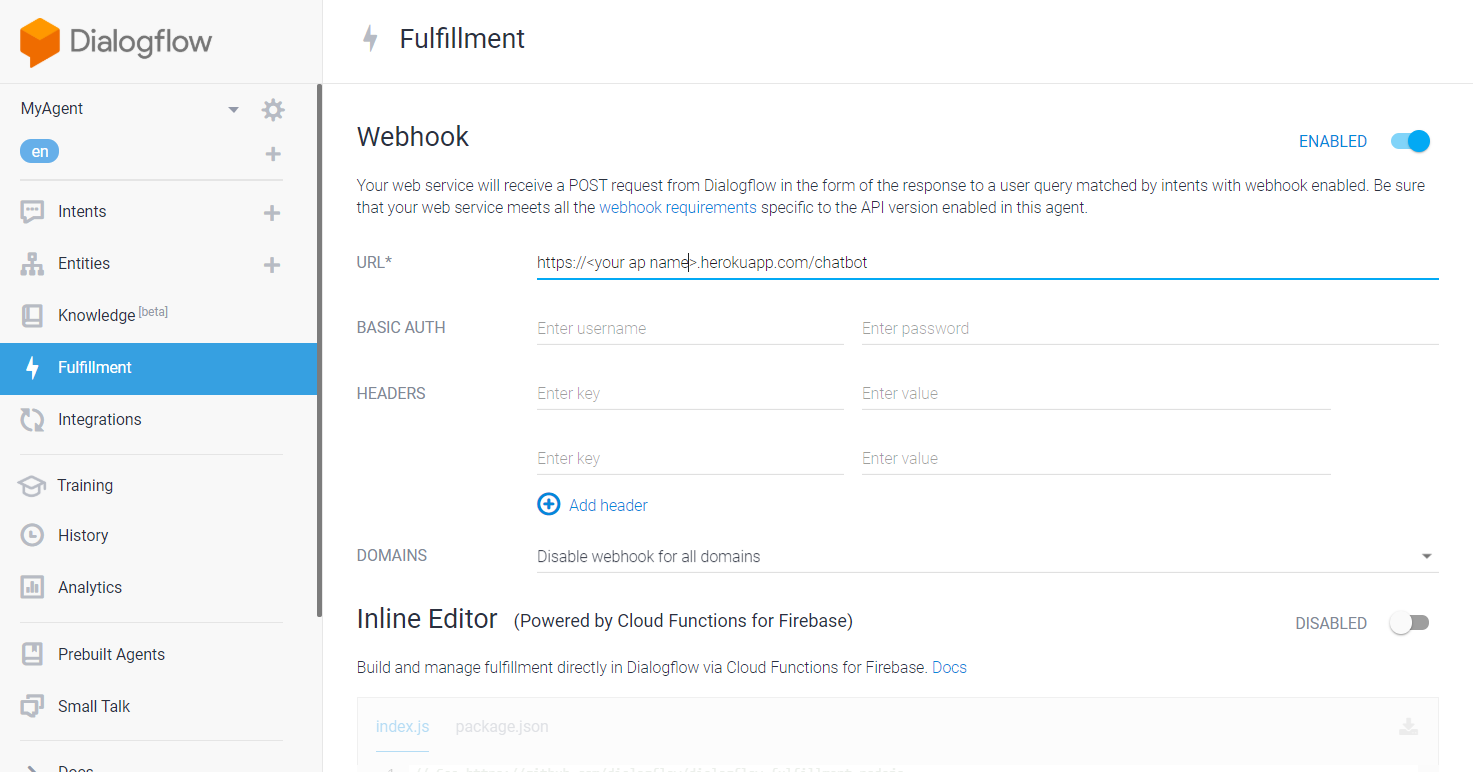
Here, provide your deployment URL on which you have deployed your node.js app.
For simplicity of development and deployment, we will be deploying our code in Node + Heroku.
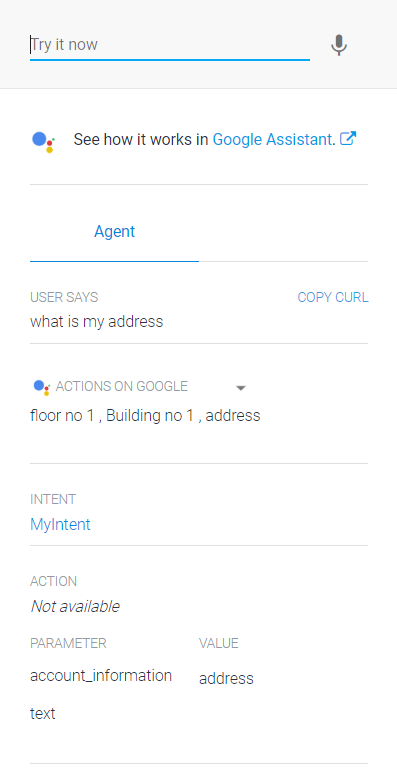
Now, go to the right-hand side panel of the dialogflow screen and type the question, "What is my address?" Below will be the output:
You can configure as many questions as you want and design intents and entities as per requirement. Happy learning!