
While numerous individuals decide to purchase a Mac for some explanation – Apple's equipment configuration is an oft-cited reason – there comes a period for a large number of those individuals when they need to run a type of PC application, and that requires Windows. Do you need to run out and purchase a full duplicate of the OS, just to introduce it on your Mac? No, you can run Windows on Mac for nothing; here's the means by which it works.
Once upon a time, Apple PCs ran on an alternate sort of CPU than all the PCs running Windows. Thus, Microsoft programming couldn't without much of a stretch sudden spike in demand for Apple PCs, and Apple programming couldn't generally run on Windows PCs (in fact, it despite everything can't, except an anxious network of clients have discovered a couple of ways around that constraint). In 2005, nonetheless, Apple settled on the troublesome choice to change from CPUs made by IBM, to CPUs made by Intel. This was a troublesome decision, since it implied that no OS X programming would work almost too, or by any stretch of the imagination, without noteworthy retooling.
Virtualization to the salvage
Almost they achieved this was using what's known as virtualization. Virtualization is the point at which you utilize a bit of programming to imitate a whole PC – you can even put in new programming on this mimiced, or virtualized, PC. These virtual PCs are known as virtual machines, or VMs, for short. This procedure is the means by which we're going to run Windows on your Mac – it's an incredible method to run Windows applications on your MacBook without the disappointment of introducing Windows in Boot Camp and genuinely rebooting your PC.
Step 1: Install software to run the virtual machines
To begin with, you'll have to introduce an application fit for running virtual machines. There are a great deal of choices to browse, some with a larger number of highlights and a superior interface than others. We're going to utilize VirtualBox, in any case, which has the most significant element of all: it's free. You'll have to go to the VirtualBox site to get it: https://www.virtualbox.org/wiki/Downloads. Snap on the little connect to one side of the Mac passage to download the VirtualBox establishment record for Mac, or simply click here to get it (this connection may be obsolete a while down the line).

When you have VirtualBox downloaded, simply double tap on the installer and adhere to the directions. They're entirely clear, and when you're done, you can launch the VirtualBox installer and erase the first .dmg document.
Step 2: Download and unzip an Internet Explorer test VM from Microsoft.
Recollect how I said that you can catch a free duplicate of Windows to run on your Mac? Indeed, you can express gratitude toward Microsoft. They comprehend that engineers and creators won't generally need to pay for or keep up all the equipment and programming important to test their sites in each form of IE running on the last a few renditions of Windows.
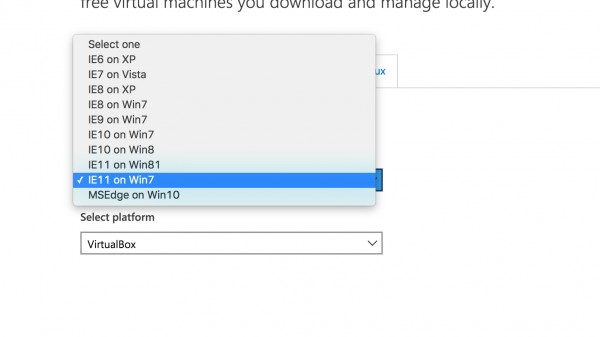
With that in mind, they give free VMs to testing purposes: https://dev.windows.com/en-us/microsoft-edge/instruments/vms/. At the date of composing, you can download one of 10 distinctive virtual machines, each with an alternate kind of either Internet Explorer or Windows itself. Contingent upon what you need Windows to run, you'll most likely need to get whatever adaptation of Windows you need that has the most recent duplicate of IE. In case you're uncertain, the variant of Windows 7 with IE 10 is a snappy download and runs well even on more seasoned equipment.
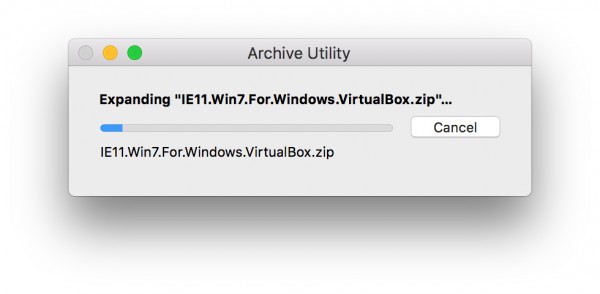
Select the adaptation of the virtual machine you need from the top drop-down menu, at that point select 'VirtualBox' from the last one. A connect to the .compress document will show up on the appropriate for you to download. Once the download is finished, double tap the compressed VM to decompress it; the conclusive outcome ought to be a record that closes in .ova.
Step 3: Open VirtualBox and ‘Import’ your new virtual machine.
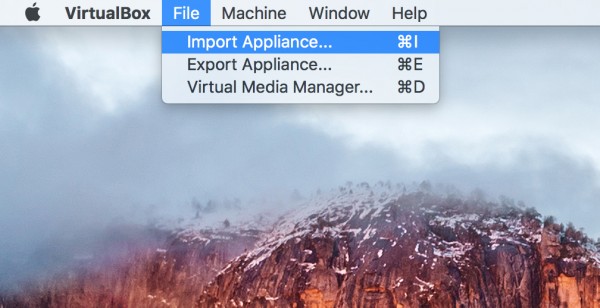
We're nearly done! Presently you have all the records you need, and it's an ideal opportunity to assemble them all. Open your recently introduced VirtualBox programming. You'll see an entirely scanty interface, yet totally disregard it for now. Rather, go up to the menu at the highest point of the screen, select record, and snap on 'Import Appliance.' You can likewise hit Command + I from the fundamental VirtualBox screen.
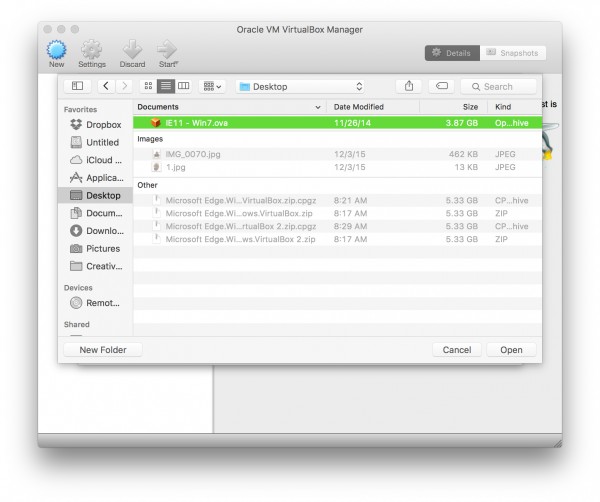
A screen will show up requesting that you disclose to it where the virtual machine you wish to import is – click on the little organizer symbol to one side of the vacant box. You'll see Finder spring up with the entirety of your records. Explore to where you unfastened the VM, or any place it is that you put the .ova record we discussed in the last advance. When you have it, quite recently double tap on it and press keep on beginning the import procedure.
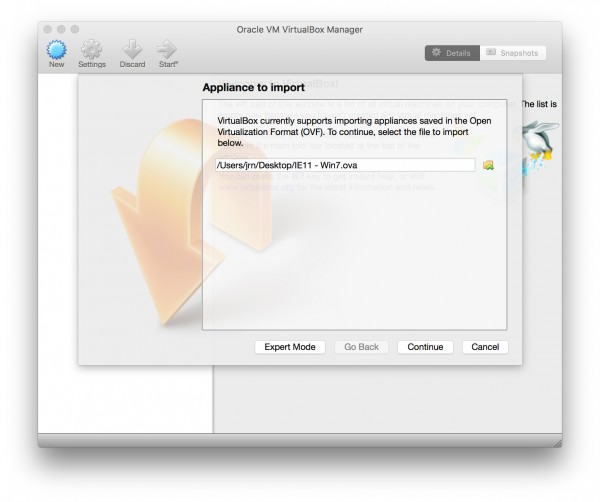
You'll see a screen spring up with various kinds realities about the virtual machine. What number of CPUs it has, how much memory, and so on. You can securely overlook this and simply press import. In case you're running this on a Mac with 8 or gigabytes of RAM, nonetheless, it is beneficial to build the measure of memory you devote to running Windows by tapping on the number and entering in 1000MB. This can make your Windows VM run somewhat better. In the event that this sounds confounding, in any case, don't stress over it until further notice. Snap on 'Import' when you're done.
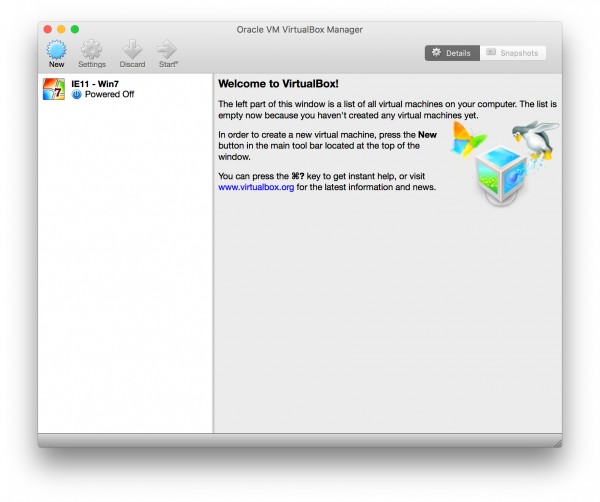
Step 4: Double-click on the virtual machine that’s listed in the left-hand pane.
It may take a couple of moments to import the virtual machine contingent upon how quick your Mac is. When it's done, be that as it may, you'll see a posting show up on the left-hand side of the VirtualBox window. This is your duplicate of Windows, whichever rendition you chose to download – it'll have a name that mirrors the variant of IE and Windows you picked. You can double tap it to begin the product, or simply select it and press the green beginning bolt directly above.
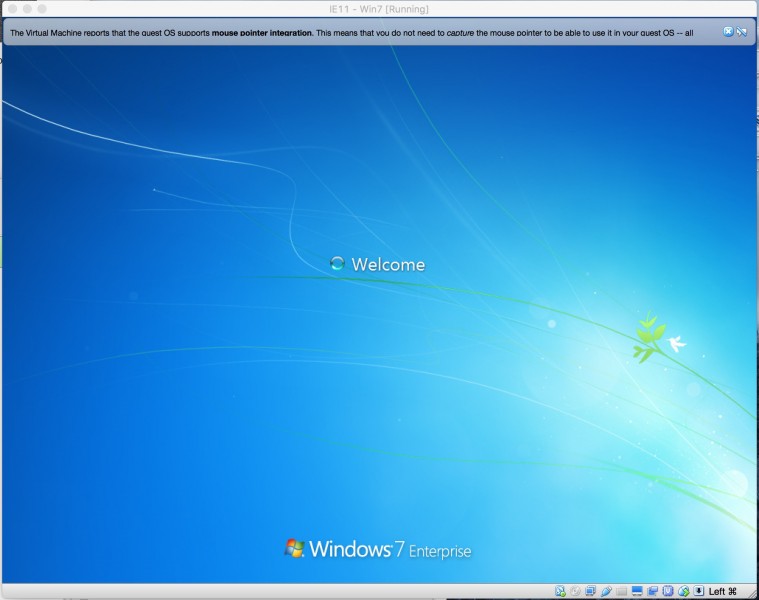
After two or three seconds, you'll see a boot screen showing up, much the same as you would in the event that you were running Windows on an ordinary PC. Most definitely, you are. After Windows loads, you'll have the option to interface with it, and do practically anything (gaming is generally unrealistic) with it that you would on a typical PC or Boot Camp establishment. You'll need to treat Windows pretty regularly – click on the Start menu to close it down when you're done, and be mindful so as to back up any individual documents you take a shot at to guard them. On the off chance that you use it all the time, you'll need to keep it refreshed and make certain to introduce Microsoft Security Essentials in case you're running Windows 7 (Windows 8 or more accompany Microsoft Defender).
Windows on MacIt merits calling attention to that Microsoft incorporates lapse dates with these duplicates of Windows – after two or three resets, you're at last constrained to a 90-day preliminary. In case you're simply utilizing the VM to run whatever you have to run for the occasion, that is presumably fine for you. On the off chance that you need additional time, notwithstanding, simply keep the first .ova record and re-import it into VirtualBox at whatever point you have to begin the 90-day time frame over (at four times each year, it's not all that a very remarkable hardship). On the off chance that you do, you ought to erase any more seasoned VMs just to spare the plate space and disarray.
That is it! Make the most of your free duplicate of Windows!